Create, Add, and Edit Custom Fields in QuickBooks Online Advanced Learn How to create and use enhanced custom fields in QuickBooks Online Advanced.
Custom fields let you track the information that matters most to you and your customers. In QuickBooks Online Advanced, you can create custom fields (see this article for other QuickBooks versions) for almost anything: sales reps, birthdays, or information unique to your industry. You can add them to sales forms, purchase orders, and customer profiles. This gives you better data and more detailed financial reports. Enhanced custom fields aren’t available for the QuickBooks Mobile App, yet. However, you can continue to use the old experience on mobile.

How to create, add and edit custom fields in QuickBooks Online ?
Step 1: Create custom fields You can have 10 active custom fields between your sales forms (invoices, expenses, estimates), purchase orders, and customer profiles. Besides text, you can also create custom drop-down, date, and number fields. Select the Gear icon from any page. In the Lists column, select Custom fields.
Step 2: Select the Create custom field. If you’ve already created a field, you’ll see the Add field option instead.
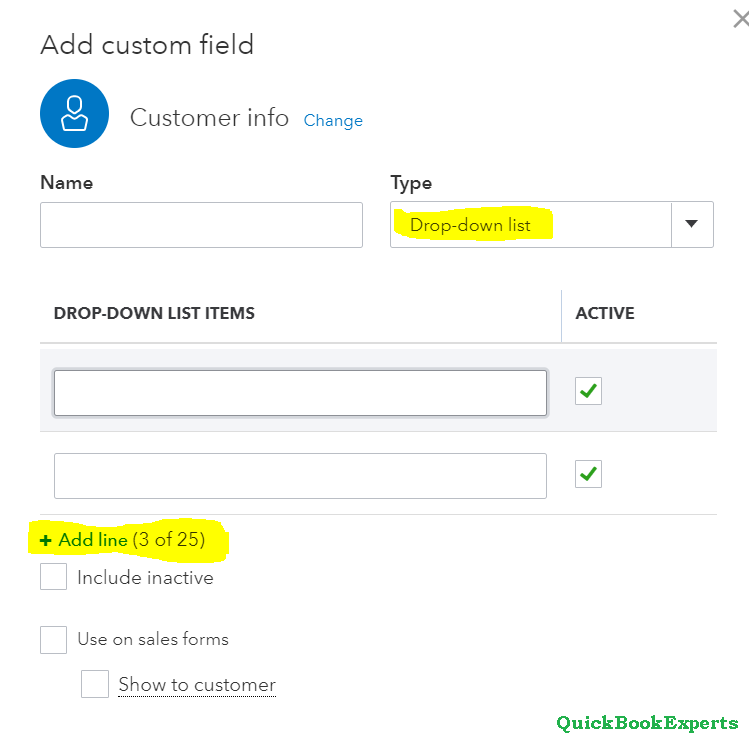
Step 3: Choose Customer info or Transaction info. Customer info fields are for customer profiles. Transaction info fields are for sales forms and purchase orders. Give your custom field a name.
Step 4: Select Text, Number, Date, or Drop-down list.
Having a Question ? Reach Us
Call : Email : Live Chat to an Experts
More Topics: Solve common errors in the QuickBooks® mobile app (Android) 2019
How to turn on and set up time tracking

