Learn how your employees can access their paychecks, W-2’s, and other employee info using QuickBooks Workforce.Give Employee Online access to paychecks and W-2s
Skip printing and mailing stubs and forms to your employees. QuickBooks Workforce makes it easy for them to view their paychecks, W-2’s, and other things that matter to them, like available time off and year-to-date earnings. We’ll help you invite your employees, so they can sign in and get started.
Have QuickBooks Online? This article is for QuickBooks Desktop Payroll. If you have QuickBooks Online Payroll, use these steps.
Invite your employee
Step 1: Log in to your Intuit account in QuickBooks
If you’re already logged in to your Intuit account in QuickBooks, move on to Step 2.
Note: Your Intuit account login is different from your company file login. Learn more about your Intuit account. Give Employees Online access to paychecks and W-2s
- From the Company menu, select My Company.
- Select Manage Your Account.
- Log in using your Intuit ID and password.
Having trouble signing in? Select I forgot my user ID or password.
Step 2: Send an invite
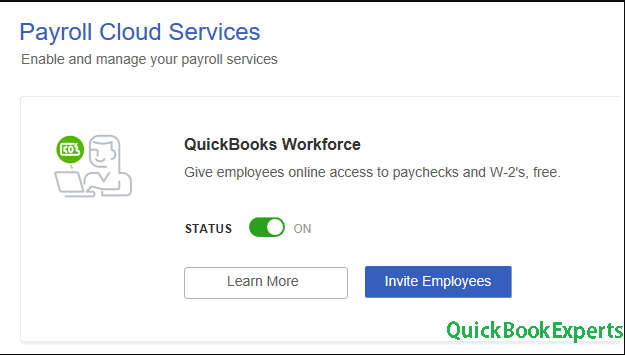
- From the Employees menu, select Manage Payroll Cloud Services.
Note: If you don’t see Manage Payroll Cloud Services, update your QuickBooks. - Under QuickBooks Workforce, toggle the status to ON, then select Invite Employees.

- Your employee list will appear. Select the employees you need to give access, then add their email addresses.
Note: If the invite page doesn’t load, make sure to turn on ActiveX controls in Internet Explorer. - Select Send Invite. Once sent, you should see “Invited” under the STATUS column.
What’s next
- Here’s how your employees can set up and use QuickBooks Workforce.
- After running payroll, your employees will get emails telling them that their paychecks are now available.
- When you process W-2’s, here’s how to make sure your employees can access the forms.


